Friday, October 19, 2012

Pasta Carbonara, because we all need comfort food

One of my favorite foods of all time is bacon and eggs. So is a great pasta dish.  Thank god for Italians, they've combined them. 

As I continue along my cooking and baking journey, I am always trying to grow.  And as with most things in life, as I continue to learn, things don't always turn out as you expected to do.  Let's talk in "recipes"..... so there was this one "recipe" that I really wanted to turn out one way, but it did not turn out that way, and I had to deal with the fallout of it not turning out the way that I had expected.  I had planned to be on a journey with this recipe for a long time, and now I am on a journey with a different recipe.  This different recipe is scary and unpredictable and nothing at all what I had planned.  So then I keep trying new recipes and other new recipes and as it turns out many of these recipes I try turn into other recipes in disguise. 

As I continue on this path of "cooking", I am discovering that I am not at all following the path I sought after.  I am not following the path that I had planned on and I'm not following the path that I had wanted to grow with.  On the other hand I am on a completely new path, and I am growing with a new set of "skills" as I continue.  I did not imagine growing with these skills, and I am unsure of my abilities.  But I will be damned if I do not learn to enjoy this new path.  I am so grateful for this new set of skills that I have come upon and I am growing in a way I never imagined.  Who knows what is yet to come?  All I know is that along the way I'll keep developing new "skills" and keep growing in a way that I never imagined. 

Sometimes you don't choose the path less traveled.  Sometimes, or maybe most of the time, where you end up isn't a choice.  Maybe the only thing you do choose is how you deal with it.  I suppose our outlook has more to do with what is inside us then what is beyond us.  Now where is my bacon?  This is what we're making.....


Buckle up.  This is real life.

Pasta Carbonara

Ingredients

For one hungry person.... double, triple or quadruple as needed

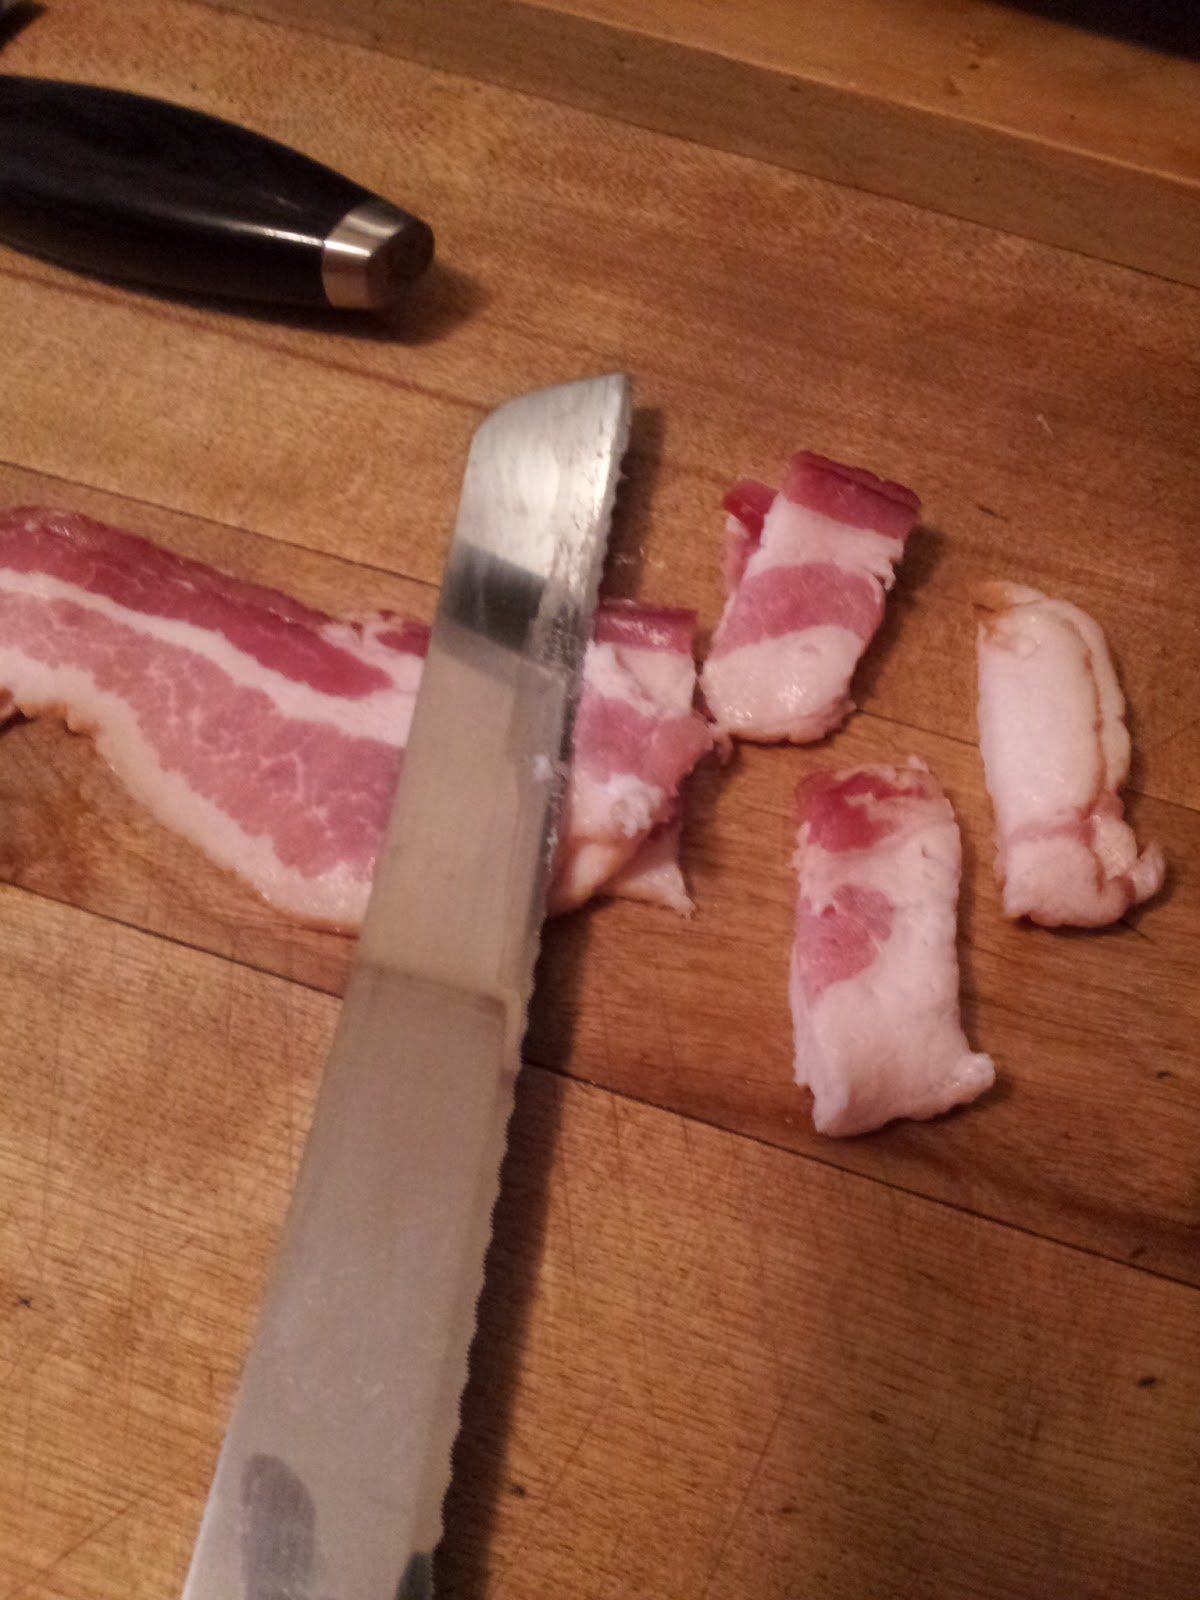
3 strips of thick cut bacon
1 red bell pepper
2 Cups of your favorite pasta 
1 Tablespoon of minced garlic (fresh or pre-cut)
1 Tablespoon of Pesto
1/4 Tablespoon of Red Pepper Flakes
2 eggs, whisked in a separate bowl

In a large pot, fill at least half way with water, cover and put on a high heat.  You want to begin with this because it will take the longest.

Next, take the red pepper and place it directly on top of the burner on a low heat.


Keep rotating the red pepper every couple of minutes or so.  The goal is to blacken, burn, the outside of the pepper.  Not only will this give you a fantastic flavor, but it will also help to remove the skin.  Once the entire pepper is blackened, use tongs, place pepper into a ziploc bag and seal.  Allowing the pepper to steam inside the bag will make it easier to remove the blackened skin.  Leave in bag for 5 minutes.  After 5 minutes use a paper towel or dish towel and gently rub the pepper.  The skin should easily peel away.  You don't have to remove every piece of blackened skin, in fact, I prefer to leave a bit on for the color.


After the skin is removed, cut the top off the pepper and remove the seeds.  I use about half of the pepper for this dish, but you can use what you would like.  Cut the pepper in half.  Dice one of the halves into 1 inch by 1 inch squares.  The other half of the pepper you can use in sandwiches or in scrambled eggs.

At this point, if not earlier, the water should be boiled.  Salt the water, no oil - it'll just sit on top of the water and not do anything, and add the two cups of dry pasta.  I personally found a pasta at the Christmas Tree Shop called Calamarata, which is pasta in the shape of calamari.... pretty awesome.  Cook the pasta a little under al dente, so that it has a little bit more of a bite than traditionally cooked al dente.  You are doing this because it will be cooked twice.  

Heat up a large non-stick skillet.  Slice the bacon into 1/2 inch pieces, throw straight into the pan and lower the heat to a medium flame.  I find using some sort of serrated knife helps to cut the bacon easier.  


The goal is to render all of the fat out of the bacon.  Once the bacon is nice and crispy, about 10 minutes, remove all the bits of bacon and keep the bacon grease in the pan.  The pasta should also be cooked by now.  Strain the pasta but reserve about a cup of the pasta water, you'll be using it.  

In the non-stick skillet with the reserved bacon grease, maintain the medium heat and add the garlic, chili flakes and pesto.  


After two minutes, don't let the garlic burn, add the pasta, reserved water and let the water heat through until it is steaming.  

Now here is the tricky part.  Take the pan off of the burner, keep the heat on, move the pan to a different burner and add the raw, whisked eggs.  Immediately stir the mixture and do not let the eggs scramble.  Keep stirring, stirring, stirring.  The goal is to create a sauce out of the eggs.  By constantly mixing the eggs, they will not scramble and they will heat through.  If you see that the mixture has lost its heat, put it back on the heat for 30 seconds and then remove again.  I find a good balance is 2 minutes off the heat, 30 seconds on, 2 minutes off the heat, 30 seconds on, etc.  As long as you keep stirring the eggs will not scramble.  Do this for about 5 minutes.  Once the eggs are heated through, pour contents directly onto whatever plate you like.  I sprinkle a little salt on top, I don't prefer pepper with this dish, and eat your heart out.  Serve with some nice ciabatta bread and butter and then you'll be able to sop up all that delicious sauce.


Stay hungry my friends.

Wednesday, October 3, 2012

Stuffed Red Peppers & Baked Arancini (Dairy-free)

I'm back from my road trip, summer is becoming a distant memory, and I am slowly embracing the fall.  The air is getting crisp and I need to use up the last of the bounty from my garden.  Lucky for me, I also have some friends that are in dire need of using up the bounty from their gardens also.  I get six gorgeous red peppers that need to be used.  Let's make stuffed peppers.  Lucky for me again, I make just a little too much stuffing and like any good cook, I will not waste what is in front of me.  Challenge accepted food!  I will make you into dairy-free Arancini (rice balls)!  Prepare to be inundated with deliciousness......


Stuffed Peppers

2 Tablespoons olive oil
3 Tablespoons chopped chives (from the garden)
1 Tablespoon of minced garlic
1.5 Cups of long-grain rice
1 Can of vegetable broth
2 Cups water

1 Tablespoon olive oil
1 Pound sweet Italian sausage

6 medium red bell peppers (sliced in half lengthwise & seeded)
1/4 Cup of fresh basil (from the garden)
2 Cups tomato sauce (I prefer Pastene ground peeled tomatoes none of that Ragu bull****)
2 Tablespoons of Italian breadcrumbs
3 Tablespoons of olive oil

1/4 Cup of Italian Breadcrumbs for the Arancini.


Preheat the oven to 375.  We're going to make the rice first, it will take the longest.  It a heavy-bottomed pot over medium-low heat, coat the bottom with 2 T olive oil and add the chives and garlic.  Saute these for about 5 minutes, then add the rice.  Stir the rice until it is coated in oil and we are also toasted the rice a bit to get additional flavor.  After a few minutes, add the vegetable broth and water (we want the liquid to rice ratio to be about 3:1).  Turn up the heat to bring it to a boil, then lower the heat to a simmering boil.  That basically means to keep the water boiling but at a gentle, lower heat.  Cover this pot and let it continue to boil for 20 minutes, at that point all of the water will be absorbed.  And don't be tempted to stir it occassionally or check it every five minutes.  Leave the lid on and leave the rice alone!  

Let's get the sausage cooked!  By the way, this meal can remain meat-free if you leave this component out.  An alternative to sausage is firm tofu for you vegetarians or ground turkey meat for a lower fat option.  You would prepare any of these options the same way.  I use a non-stick skillet on medium heat with a Tablespoon of olive oil, put the meat in, and break it into bite-size pieces.  If the sweet sausage is in casings, just remove them before putting the meat in the pan.  It will take about 15 minutes.  Once cooked and broken into bite-size pieces, put into a mixing bowl to cool.  


Let's check on that rice.  After about 18 minutes I peek under the lid of the pan and see that all of the water has been absorbed.  Turn off the heat, cover the pan again so that no steam escapes and let sit for about 5 minutes.  What this does is give the rice a fluffy consistency once the water is absorbed.  After 5 minutes, take off the lid, use an ordinary fork, and "fork" the rice.  This means to roughly rake the rice from the bottom as you would leaves on the ground.  Put the fork in between the edge of the rice and the pan, with the tangs all the way to the bottom of the pan.  Move the fork towards the center of the pan but as you get closer to the center slowly lift the fork upwards.  Almost as if you are creating air in between the rice grains.  Go gently and try not to break the rice grains.  


Hopefully that is descriptive enough.  Once the rice has been "forked", add it to the sausage mixture.  At this point, also add the basil, salt and pepper to taste, and 2 Cups of tomato sauce.  Mix well and set aside.

To the red peppers!  Slice lengthwise and remove all seeds (the picture below still shows the peppers with the seeds but I wanted to show how I sliced them).  


In a baking dish, pour 2 T of olive oil in the bottom and spread evenly.  With a spoon, fill the halved peppers with the sausage and rice mixture.  I like to fill every crevice and tightly pack the mixture.  I'll have the mixture rounded over the top of the pepper as well, don't be shy, fill those babies up!  Once they are filled and neatly arranged in the baking dish, sprinkle the tops with breadcrumbs and then drizzle olive oil over the tops.  The olive oil will help the tops to develop a crunchy, thin crust.  


Place the baking dish, covered with aluminum foil, in the oven for 30 minutes.  

Now, I have about 2 cups of leftover sausage and rice mixture.  This will make a delicious snack or side dish in the form of Arancini.  All we need now is that 1/4 cup of Italian breadcrumbs.

Take a small handful, about 2 T, of the rice mixture and roll into a tight ball.  It will be about the size of a small traditional meatball.  Once tightly made, roll the ball into the breadcrumbs.  It will be a light coating and that is just fine!  Line a cookie tray with foil or parchment, place the Arancini's on the pan and drizzle with olive oil.  By the time you are finished preparing the Arancini's, the peppers should have been in the oven for about 15 minutes, this is perfect timing.  Put the sheet of Arancini in the oven with the peppers and allow to bake for 15 minutes on one side.  


Once the peppers have been cooking for 30 minutes, remove the foil from the pan and let bake for an additional 20 minutes.  Once the Arancini have been baking on one side for 15 minutes, turn over and allow the other side to bake for 15 minutes, or until both sides have a slight crust.

If the peppers, after an additional 20 minutes do not have a slight crust formed on the rice mixture, allow it to bake at 5 minute intervals until it reaches the desired color.  When the peppers and Arancini have reached the desired color and texture, remove from the oven, sprinkle with Kosher salt and allow to cool for a few minutes.  Traditionally Arancini are served with marinara, but you could always just gobble them up as soon as they are ready to eat.... just like I did.....


Wednesday, September 12, 2012

The Red Iguana - A Mexican Tradition in Salt Lake City, Utah

So I'm in the midst of a road trip. I started in Rhode Island, flew to Colorado, made multiple trips along the way to San Francisco and now I'm eating my way back east across the country with my best friend. Life. Is. Awesome. 

So after driving 12 hours from the foggy city by the bay, finally finding gas under $4 a gallon, and having an impromptu photo shoot at sunset complete with mountains, desert and salt flats, needless to say we were ready to fill our bellies with something besides peanut butter and jelly road sandwiches.  Where to go?  We were in a strange city with strange preconceived notions of strange religious-heavy undertones.  Would we be feasting on manna or would there be something more?  An app would come to our rescue.  Mytvmaps saves the day.  The Red Iguana was featured on Diners, Drive-ins and Dives.  If its good enough for Guy Fieri it's good enough for me.


Opened in 1985 by the Cardenas family, and owned and operated by the family ever since, this place is famous for its homemade mole sauce and boy, there are plenty to choose from.  In our starving and road-weary state it is next to impossible to decide.  Thank god for our knowledgeable waiter who brings us a sampler plate of all the moles so we can try them with our tortilla chips he had brought out earlier with accompanying homemade salsa. 


They range from sweet, fruity with fiery-heat to smoky, rich and chocolaty.  Some have distinct nutty notes and others a pleasant pumpkin seed flavor.  We decide on the mole negra and mole amarillo both served over chicken.  We also get three tacos filled with carne asada and homemade pork chourizo (tacos con ramon).


Let's talk about these corn tacos.  Nice and crispy yet still soft, just enough meat filling, and savory with the right amount of smoky.  Plus they have a nice hint of just-right salty cheese, wonderful fresh salsa and this lime-ish sauce that rounds out the flavors.  The mole-covered chicken is served with fresh corn or flour tortillas and rice and beans.

Everything is spot on.  The flavors are bright, flavorful, smooth, savory and sweet.  Everything is distinct.  Everything is well made.  Everything is hitting the spot.  Thank god.  I've had dinner and two lovely drinks.


This one is fantastic.  It even has a sugared flower in it and is one of their specialty margaritas.  I'm ready for dessert and I see that they serve fried ice cream.


This was the only thing I wasn't particularly impressed with.  They took about a 2-scoop size of vanilla ice cream and rolled it in loose coconut.  They then placed it in a flour tortilla, deep-fried it and sprinkled it with cinnamon and sugar.  I could have done without with loose coconut.  In fact, I could have done without the flour tortilla too.  Definitely not my favorite fried ice cream.  At least the fruit on the side, strawberries and blueberries, were super fresh.

All in all, I would absolutely come back to this joint anytime I revisited Salt Lake City.  The waitstaff is friendly, accommodating, and you can tell that this place takes pride in what they serve.  I felt like I was treated as well as any family member.  Although they may not remember me, I won't be forgetting this place anytime soon.

Red Iguana on Urbanspoon

Wednesday, July 18, 2012

Cooking The Catch: Fish Tacos & Crabmeat Stuffed Flounder

So, we've caught our fish and filleted them up!  Now, we need to cook these bad boys.  How about some flounder fillets with crabmeat stuffing and beyond fresh fish tacos ?  Cool?  Let's do it!

Flounder with Crab Seafood Stuffing

Ingredients

4 Flounder Fillets
1 package of store-bought crabmeat stuffing - about 1lb
1/4 Cup of Butter Crackers (Ritz)
4 Tablespoons Salted Butter - Melted
Salt & Pepper to taste
Olive Oil

Prep Time: 10 Minutes
Cook Time: 15 Minutes

Preheat oven to 375 degrees.  On a cookie sheet or other oven safe large pan, cover with aluminum foil and drizzle a few tablespoons of olive oil across.  Rinse flounder fillets and pat dry with a paper towel.  Lay all four fillets on pan, sprinkle with salt and pepper and add a nice thick layer of crab stuffing across each fillet.


For two of the fillets I am going to roll them and the other two I leave flat.  The ones I roll, I use a few toothpicks to keep from unrolling.  To be honest, there's no need to roll them.  I think that the flat ones have a larger surface area for the buttery crumbly butter crackers that I will immediately cover these in and then douse with butter.  Cook for 15 minutes until you can see the fish is firm and white.


          Before                                                                                  After
 

Let it cool for about 10 minutes.  In the meantime, let's make some fish tacos!


Fish Tacos with Peach Salsa

Ingredients

- Fish
4 Scup Fillets
1 Lime, Juiced
1 Quart Sized Plastic Ziploc Bag

- Peach Salsa
2 Ripe Peaches
1 Medium White Onion
Big Handful of fresh Cilantro
1 Lime, Juiced

8 Corn Tortillas
Vegetable Oil

Prep Time: 30 Minutes
Cooking Time: 15 Minutes

Whether you buy a piece of meat from the supermarket and catch your own super-fresh fish, always rinse for a few seconds to get any little something something off.  Then, put the fillets in the quart-sized ziploc bag.  Slice a lime in half, and I recommend using a juicer to juice the lime.


Juice the lime straight into the bag.


Refrigerate for 30 minutes.  In the meantime, let's make the peach salsa.  Slice the peaches in half, remove the pit, then dice into roughly 1/4 inch pieces.


Put in a large bowl, dice the white onion into the same 1/4 inch pieces and also add to the bowl.  


Take that handful of cilantro and chop roughly chop into tiny pieces and add it to the peaches and onion.  Then juice 1 lime straight into the mixture, mix, and voila!


After the Scup fillets have marinated, turn on the broiler in your oven to high, put aluminum foil over a cookie pan or other flat pan, and drizzle a few tablespoons of olive oil over the foil and put the fillets on the pan.  Broil fillets for 7 minutes, 4 minutes one side, 3 minutes the other side.  You want the fillets to be light and flaky.

Before                                                                                            After

While the fillets are in the oven, fill a small cast-iron skillet with vegetable oil to a depth of about 1/4 inch.  It will not take too long to heat up.  Prepare a plate with a few paper towels to absorb the oil after the corn tortillas are cooked.  Once the oil has heated up, a few minutes at a medium high heat, add one corn tortilla and let cook for about 30 seconds.  If the oil at the edge of the corn tortillas isn't bubbling then the oil isn't hot enough.  After 30 seconds turn over with some tongs.  The tortilla should be lightly crispy but still pliable enough to fold gently in half.  


I like to use 2 corn tortillas and 1 fillet for each taco.  Let the tortillas cool for a few minutes.  Then place one tortilla inside the other, add the fillet and peach salsa.


The only thing I would recommend is to marinate the Scup fillets at the beginning if you plan on cooking both of these.  That way they will be finished around the same time.  

Now eat your heart out, you've earned it.

Tuesday, July 3, 2012

Fishing the West Passage & Filleting the Catch

Every June in Rhode Island, there is an event that defines the summer....for some.  It is an assemblage, a gathering, an extravaganza.  In a word, it is a BioBlitz.  An opportunity for those with a passion for the natural world to come together and explore.  Put on by the Rhode Island Natural History Survey and attended by scientists and those interested in our surroundings, this year almost 300 people attended this 24-hour event.  During this event, participants are broken up into teams, e.g. plant team, bird teams, mammal team, and marine team, to name a few.  I participated on the marine team.  Why?  Because I like boats, and I like water, and I have found that I like to haul things out of the ocean.  It probably stems from the Portuguese and Italian heritage.  

The goal of the marine team was to catch as many different marine species as possible.  And this is how we began:


We began by fishing for fluke (aka Summer Flounder).  I think the other thing I love about fishing is the opportunity to emulate prey.  The bait on the pink squid on the right is shiny and attracts fish.  I'm not entirely sure why the pink attracts fish but it does.  As we drift in the ocean, lightly bobbing our bait along the bottom, I feel a pull.  I'm not entirely sure that I have something, then my line bends, and our Captain points and nonchalantly says, "you've got something."  So I reel and reel and reel.  Much to my great pleasure I pull this out of the ocean:


So awesome.  And it didn't even eat the bait!  Over the course of the event our marine team kept three Fluke and five Scup.  We also caught and released three black sea bass and a little skate.


And you can't beat the view:


And after 24 hours of blitzing we are ready to depart but not without our fish.  I thought I would take this opportunity to share how to filet fish.  I, of course, did not partake, but our trusty Captain has many years of filleting under his belt and provided great direction.

Let's start with the Fluke, and remember, everyone has a different way to do it.  But this makes a lot of sense:

Step 1) Make sure the fish is dead.  Sever the spinal cord by putting your knife through the gill and down through the spine.


Step 2) I think the pictures may be more helpful than trying to explain it....


Run the knife down the lateral line


Run the knife along the bones separating the filets from the ribs.  There is a thin bit of connective tissue that separates easily with a sharp knife.


Again, run the knife down the center of the fluke to separate the filet.


Now let's get that skin off


Needless to say, a very sharp filet is essential for this process.  And stay tuned to see how I cook these bad boys up!